

okay folks, here it is. the kidlet pants pattern piece, ready for download. i was planning to write it up all proper-like, with full instructions and diagrams like my fleur playmat pattern, but if i wait to find time to do that, this pattern will languish on my hard drive like the many others i have half written. so since it's a freebie, it's a little more laissez-faire, just the traceable pattern shape and some very basic instructions here to get you started.
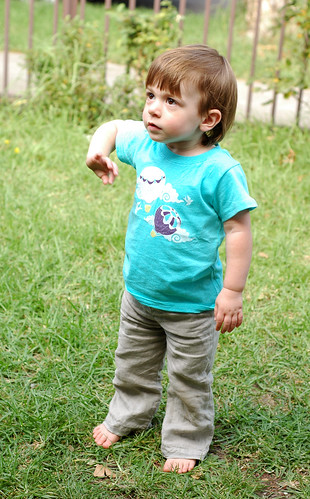
maesey sporting the kidlet pant in linen, refashioned from a dress of mine.
the pattern is one simple piece you can adjust to use a number of ways - it doesn't include seam allowances so you will need to add those when you cut, leaving extra space at the leg and waistband for hemming. i've been using it mostly to refashion other pieces of clothing, using the existing hems of shirts or dresses for the bottoms of the legs saves heaps of time. i've made mae pants out of linen, jersey and flannel (pjs made from the previously useless cot pillowcase that came with her sheet set - sweet!) using this pattern, all with great results. it's a nice straight leg and slim through the hips (probably too slim for cloth nappies). all you need to do is cut out four pattern pieces (two on the right side of the fabric and two on the wrong side of the fabric - fold it over and cut them all at once!), sew the outer leg side together (or cut your pieces with the outer leg side on the fold so you can skip this seam), do your hem on the ankle, then sew up the inner leg. once you've done both legs, turn one leg wrong side out and slip the other leg inside (right side out), lining up the tops of the inner leg seams, then sew right around the U shape formed by both legs together. now all you have left is the waist hem - measure out how much elastic you need on your own little kidlet (mae's waist is about 50cm), sew the hem down leaving a space for feeding the elastic through, put the elastic in and sew its ends together, then finishing sewing up the waist. done!
okay, i know these instructions aren't going to be much help to a complete beginner. and i feel really bad about it and would love to make everything crystal clear as i know how frustrating written instructions can be to decipher, especially without diagrams. but as i said, if i leave this until i have the energy or motivation to make it the way i would like, it just won't get done. so hopefully some of you will still get some use out of the pattern - anyone who has sewn a pair of pants before should have no trouble whatsoever. and i would so love to hear about it if you do make some!
oh, as for sizing - mae is 20 months old and about 84cm (33 inches) tall. this pattern should fit most kids between 18 months and three-ish but you may need to add or subtract some length on the leg. for younger kids (maybe 1 year old) you could make them without adding the seam allowance on the inner and outer leg and for big three year olds, try cutting bigger seam allowances.
why thank you very much, I have been admiring these and will use your pattern, it's so nice of you to share.
ReplyDeleteMy eldest (12) is away on camp and my middle child (5) has gone away with Dad, I only have 2 year old twins at home - just when I thought I would get a break you came up with this pattern! Definitely on my to do list in the next two days!
ReplyDeleteNo really, THANK YOU!
I'm excited to make this pattern, thank you :)!
ReplyDeleteMy son is 14 months so I'll try without adding seem allowances. It's a great silhouette.
thanks Leslie! oooh! so many pants to make, so little time!
ReplyDeleteThanks Leslie, although I am only a beginner, I think I may just attempt them and see how I go, they are just gorgeous (although the model may influence the opinion)
ReplyDeleteThanks! i made these for my just turned 2 year old. he was napping so I tried them on his tall but skinny 4 1/2 year old sister (who wears mostly 5's) and they fit her too but more as a skinny capri legging. I've already promised her some because she wouldn't take off her brother's!
ReplyDeleteThanks again!
Jill
Yay, I just made a pair for Olivia from a pillowcase, turned out great, especially given it is the first thing I have ever made/sewn! Thank you so much for the inspiration to begin with, the advice on getting started, and the free pattern, I wouldn't have done it if weren't for you! I have uploaded a pic to my facebook profile if you want to see how I went :)
ReplyDeleteI made a pyjama-pair for my sun. It turned out very nice, and it is a really easy pattern. Thank you very much! (I have a picture on my blog, if you want to see the result.)
ReplyDeleteI made another pyjama with your pattern, and it turned out very nice once more (picture on my blog). Thanks again!
ReplyDelete